
The short answer: Yes, in most cases RV delamination can be repaired, but the right fix depends on how far it has spread and whether the wood or foam behind the fiberglass is still dry and solid. A small, dry bubble can sometimes be re-bonded with adhesive injection. A larger area, or one where water has soaked or rotted the backing, usually needs that section of the wall, or the whole panel or front cap, cut out and replaced. Either way, the leak or damage that caused it has to be found and sealed first, or the delamination will come back.
This guide explains how to check your RV, which repair fits which damage, how insurance usually treats it, and what to look for in a repair shop.
What RV delamination is (and why it starts)
Many motorhomes, travel trailers and fifth wheels have laminated sidewalls: a thin fiberglass outer skin glued to a backing layer (often lauan plywood), with foam insulation and framing behind it. Front and rear caps are usually molded fiberglass. Delamination is when that outer skin lets go of the backing. You see it as a bubble, a wave or a ripple in a wall that should be flat.
The most common causes are:
- Water getting in. Failed sealant at the roof edge, windows, vents, marker lights, slide-outs or trim lets water reach the backing. Wet lauan swells, the glue breaks down, and the skin separates.
- Impact. A collision, a low-clearance strike, a tree branch or hail can break the bond or crush the backing without cracking the fiberglass.
- Flex and stress cracks. Small cracks from road flex and age let moisture in if they are not sealed.
- Weak bonding from the factory. Some cases come from adhesive that was poorly applied when the RV was built.
How to check your RV for delamination
You can do a basic check yourself in a few minutes:
- Look along the wall in low, angled light. Stand at one corner and sight down the sidewall. Bubbles and waves show up best in early morning or late afternoon sun.
- Press gently. A solid wall feels firm. If an area flexes, feels spongy or makes a crackling sound, the skin may have separated.
- Tap it. Tap along the wall with a plastic spoon or your knuckle. A bonded area sounds solid; a delaminated area sounds hollow.
- Compare sun and shade. Bubbles often grow when the wall heats up in the sun and shrink in the shade. That change is a strong sign of separation.
- Check the seals around the bad spot. Look above and around it for cracked sealant, loose trim or water stains inside the cabinet or wall.
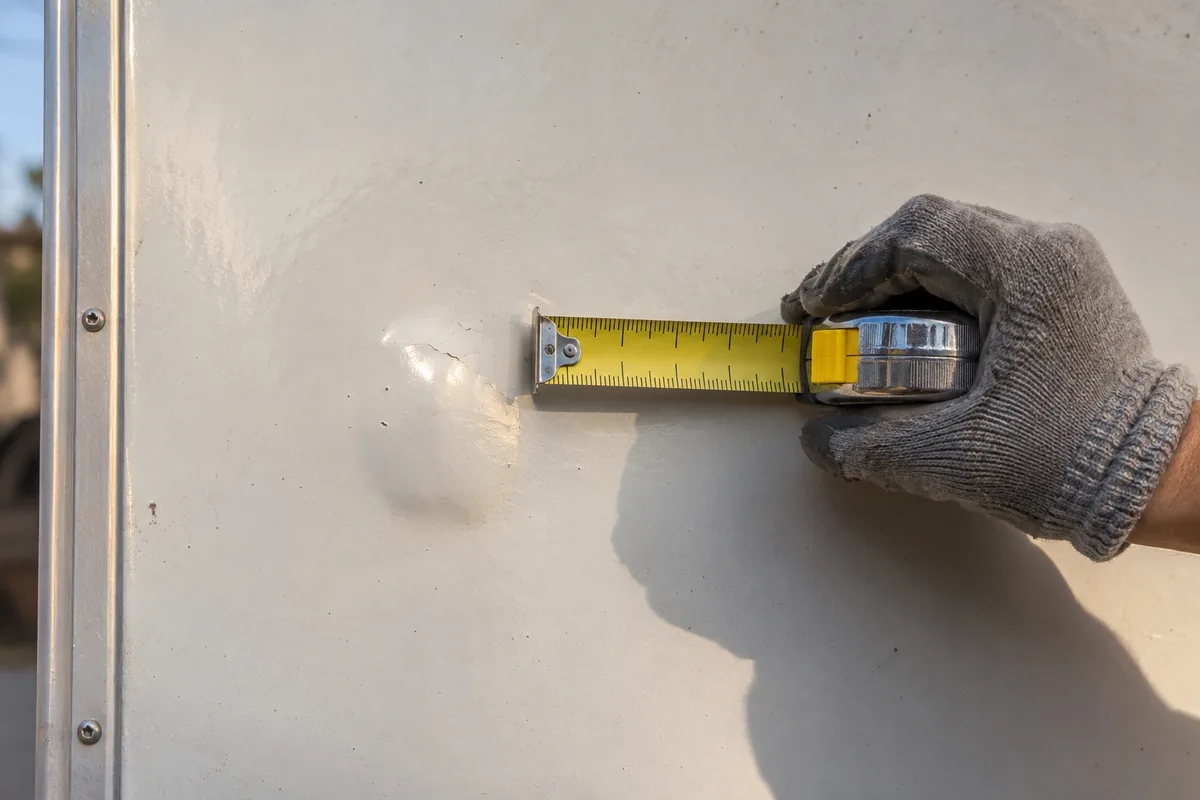
Photograph what you find with a coin or ruler for scale. Those photos help a shop give you a useful first opinion and help with an insurance claim if the damage came from an accident or storm.
Can it be fixed? Repair options compared
There are three main repair approaches. A shop should decide which one fits after inspecting the wall, checking for moisture and finding the source of the damage.
| Repair approach | When it usually fits | What it involves | Main limits |
|---|---|---|---|
| Adhesive injection | Small, early bubbles where the backing is still dry and firm | Small holes are drilled, a structural adhesive is injected behind the skin, and the area is clamped or braced flat while it cures | Does not work if the backing is wet, soft or rotted; the small holes must be filled and refinished |
| Section repair | A larger area on one part of a wall, often around a window, light or corner | The damaged skin and backing are cut out, the framing is repaired, new backing and fiberglass are bonded in, and the seams are blended and painted | Requires careful color and texture matching; the leak source must be fixed at the same time |
| Full panel or cap replacement | Widespread separation, rot in the backing or framing, or a crushed front or rear cap | The whole sidewall skin or cap is removed and replaced, then sealed and finished | Biggest job and the longest wait for parts; graphics and paint may need to be redone |
Repair kits sold online are meant for the first case only. If the area is large, soft, or near a window or roof edge where water may be getting in, it is worth having a body shop look before you inject anything. Adhesive pumped over wet or rotted wood can trap moisture and make a later repair harder.
Leak delamination vs. damage from a collision or hail
It matters why the wall separated, both for the repair and for any insurance claim.
Leak-driven delamination usually starts small near a seam, window, vent or the roof edge and spreads slowly. The wood behind it is often wet. The repair has to include finding the leak and resealing it, and sometimes replacing wet framing.
Impact delamination shows up right after an event: a side-swipe, backing into a post, a low-clearance hit, a fallen branch or a hailstorm. It often sits next to other damage such as cracked trim, a dented corner, a crushed cap or broken lights. Because the RV body works as one structure, a strike on the cap or corner can loosen nearby wall sections and seals too. That is why the full inspection matters. If you are dealing with a recent accident, our complete guide to RV body repair covers the rest of the collision repair process.
Does insurance cover RV delamination?
It depends on the cause. Delamination from slow leaks, aging seals or skipped maintenance is usually not covered. Progressive, for example, notes that RV insurance typically won’t cover delamination repairs because regular inspection and resealing can prevent it.
When the separation is part of damage from a sudden event, such as a collision, a low-clearance strike, a storm or hail, it is generally handled as part of that claim under your collision or comprehensive coverage, subject to your policy and deductible. Every policy is different, so ask your agent or adjuster how your coverage applies.
To keep a claim clean:
- Photograph the damage and the event (location, date, what was hit) as soon as possible.
- Keep records of seal inspections and resealing work. They help show the damage is new and not neglect.
- Do not try a DIY fix before the adjuster or shop has documented the damage.
- Remember that in Arizona you have your right to choose the repair shop under A.R.S. § 20-468, even when the insurer recommends one.
If the RV is still under a manufacturer warranty, check that too. Some delamination from factory bonding problems is handled by the manufacturer or dealer, not insurance.
Why Arizona sun and heat make it worse
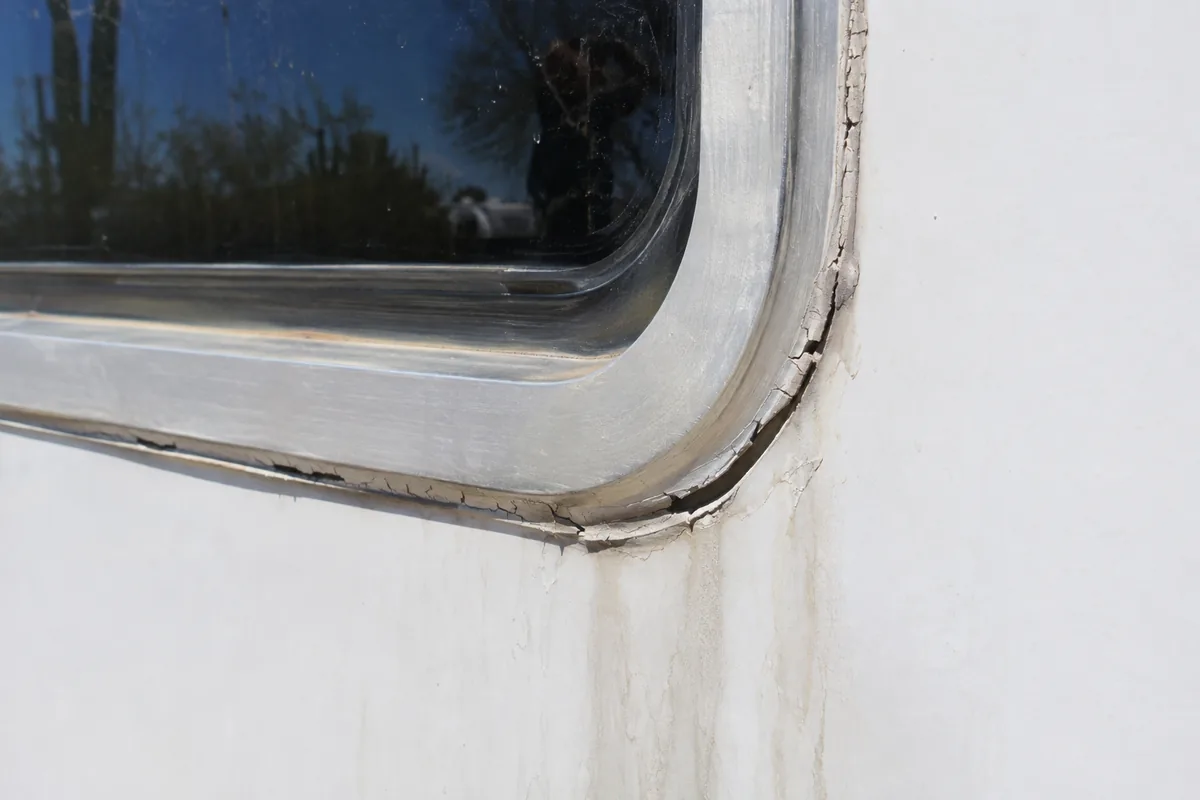
Laminated walls are glued structures. Constant heat and strong UV in Southern Arizona age the sealants around roof edges, windows and trim faster, so they crack and shrink sooner. A dark or sun-facing wall can get very hot in summer, and the daily cycle from hot afternoons to cool nights makes the skin and backing expand and contract at different rates. That stresses any weak spot in the bond.
Monsoon storms then bring hard rain and wind-driven water against those aged seals. The pattern many owners see is a dry spring and summer that crack the sealant, followed by monsoon water that finds the gap. To learn more about how the Arizona sun damages vehicle finishes, see our guide to prevention and repair.
What helps:
- Inspect roof, window, vent and trim sealant at least every six months and before monsoon season. Use sealants made for RVs, not household caulk.
- Store the RV covered or under shade when you can.
- Fix small cracks in the fiberglass or sealant as soon as you find them.
How to choose a shop for RV delamination repair
Delamination repair is body work on a large vehicle, so the shop needs the space, the materials know-how and the paint skills to make the repair disappear. Before you choose, ask:
- Can you fit and work on my RV indoors? Large motorhomes need tall, long bays, and adhesives and paint cure best in a controlled space.
- How will you find the cause? A good shop looks for the leak or the impact damage, not just the bubble.
- Which repair do you recommend, and why? You should get a clear reason for injection, a section repair or a full panel or cap.
- Can you match the finish and graphics? RV gelcoat and paint fade differently in the sun, and matching aged colors takes experience.
- Do you work with RV insurance? Specialty RV insurers have their own claim steps, and a shop that knows them can save you back and forth.
- What warranty comes with the repair? Get it in writing.
At Cutting Edge Collision Center, our team has repaired RVs for over 20 years for Tucson’s largest RV dealers and their customers. We handle fiberglass repair, gelcoat restoration, sidewall repair and replacement, and front and rear fiberglass cap replacement, and we can fabricate aluminum panels. We work with all insurance companies, including specialty RV insurers, have indoor space for multiple RVs including full-size Class A motorhomes, and back our work with a lifetime warranty. See our RV collision and fiberglass repair in Tucson services for more.
RV delamination FAQ
Can I still drive or tow an RV with delamination?
Small cosmetic bubbles are not usually a safety issue on their own, but they tend to grow, and the water behind them can rot the framing. If the delamination follows a collision, or the wall or cap is loose, cracked or moving, have it inspected before a long trip.
Will delamination spread if I wait?
Usually, yes. If water is getting in, the separation keeps growing with every rain and heat cycle, and a repair that could have been small can turn into a full panel job.
Do DIY delamination kits work?
They can work on small, dry areas where the backing is still firm. They do not fix a leak, wet wood or rot, and a poor injection can make a professional repair harder later.
How much does RV delamination repair cost?
It depends on the size of the area, whether the backing or framing is damaged, the parts needed and the paint and graphics work. A shop has to inspect the wall before it can give you a real number. If the damage came from an accident or storm, your insurance claim may cover much of it.
Get your RV checked in Tucson
If you have found bubbles, soft spots or a cracked cap, have it looked at before the next rain. Call Cutting Edge Collision Center at (520) 624-2787, visit us at 350 E Irvington Rd in Tucson, or Request an Estimate online.
Get a Free Estimate
Contact us today for a no-obligation estimate. We work with all insurance companies.